User-Generated Content Guide
Hi Captains!
The User-Generated Content section is available on the Pixel Starships website (announced here). Time for a quick guide to help budding designers with the submission process!
UGC: The Basics
Step 1: Visit pixelstarships.com and log in to your preferred account. Then, access the UGC Page from the navigation bar. From here, select ‘My Submissions’.

Step 2: Select the ‘New Skin’ option. A Skin Design includes all images used in one place (Interior image, Destroyed image, etc.).
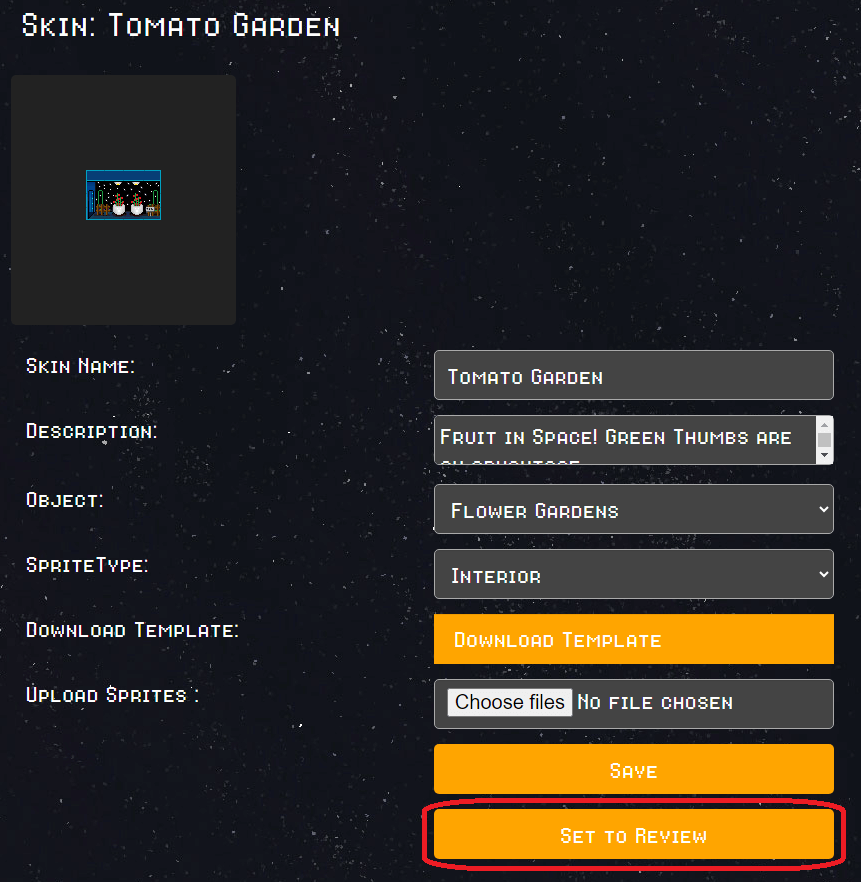
You will then be prompted to provide a Name and Description for your Skin. You can edit the Skin Name or Description at any time from the Update Skin page.
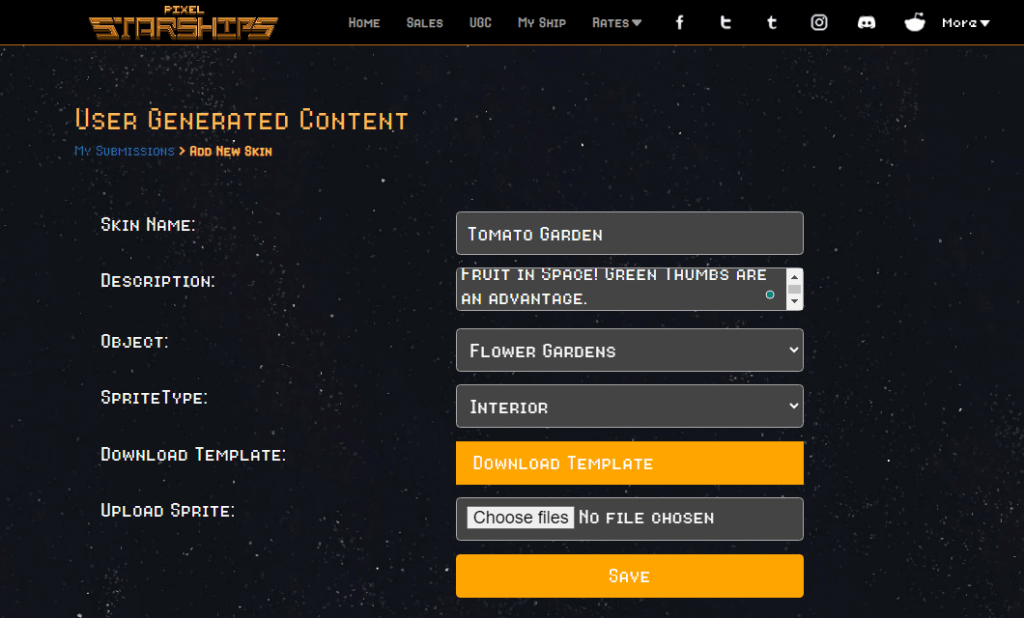
Object: Allows you to choose what Room the Skin is for.
Sprite Type: Dictates what the image is for – Interior of Ship, Exterior of Ship, how it looks when Destroyed or when it is Active (animates/fires).
While some Rooms won’t require an animation (Active), we recommended that Weapon Rooms do.
Download Template: Provides an image matching the exact size and border of the Original Room.
Upload Image: Allows you to select and upload an image that to use in your Skin.
Images that are the incorrect file type or dimensions will be rejected by the system, with a prompt noting what needs to be changed.
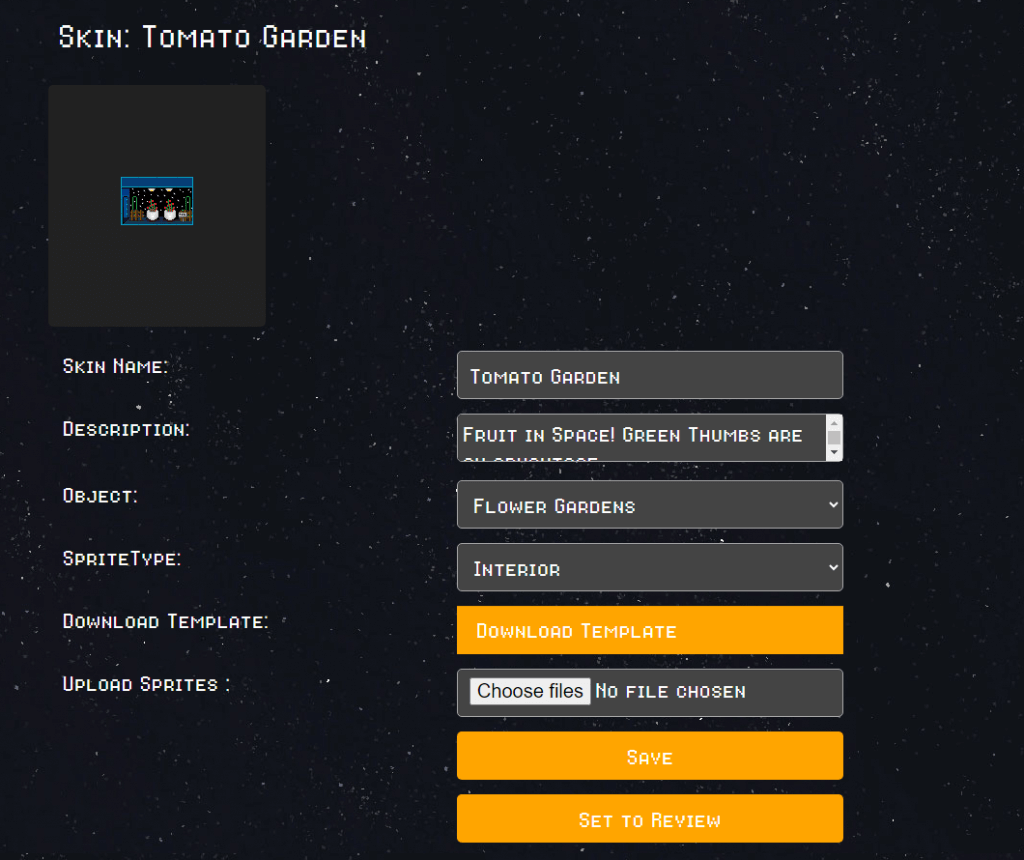
Step 3: After choosing an image to upload, selecting ‘Save’ will add it to your Skin Design.
If you have uploaded multiple Sprite Types, the ‘Set Profile’ button will choose which image is displayed on the Voting Page.
UGC: Animations
Adding an Animation Sequence to your Skin can also be done on the Update Skin page.
Step 1: Upload an image for your animation as an InteriorActivate or ExteriorActivate Sprite Type, then select ‘Save’. Do this for each Image you would like to be a part of your animation.
When uploaded, the ‘Sprite Sequences’ section will list each image ready to be added to your animation.
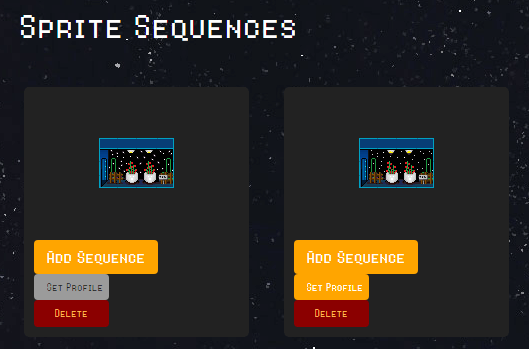
Step 2: Start with the first/base image by selecting ‘Add Sequence’. This will add the image number to the Sprites field.
Do the same for the next image you would like in the animation sequence, until all images have been added in your preferred order. If you make a mistake in the order, you can select ‘Clear Selected Animation’ to start again.
Step 3: Update the ‘Duration’ field. This field shows a value of 0 by default, meaning there is no animation (yet!). Enter the number of seconds you would like the animation to run for (1 for 1 second, etc.).

Once you have entered your preferred Duration Value, select ‘Save and Reupdate Sequence’.
You can now test the Animation Sequence by selecting ‘Play’. Once you are happy with the result, select ‘Save and Reupdate Sequence’.
UGC: Submission
It’s time to submit your skin for players to vote on!
On the ‘Update Skin’ page, select the ‘Set to Review’ button at the bottom of the Skin Name & Description Panel.
Once submitted, this button will change to ‘Set to Draft’, enabling you to remove your submission or to make additional changes before re-submitting.
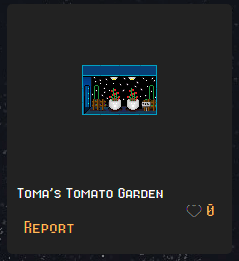
Your Skin will now show up on the main UGC Page for players to vote on. The tally of votes is displayed next to a Heart icon on your design.
Players can also Report a submission for offensive content.
The team will review these submissions periodically, adding popular designs that do not breach any of the rules outlined here.
If published, each time a player purchases the design using Starbux, a portion of the sale will be sent to the designer’s account Inbox.
If you have any additional questions or would like to report a bug with this system, please head to our official Discord channel or by emailing us here.
The UGC system will continue to expand into the future, including the ability to create your own Hull Stickers!
-SavySoda Team

